 Cost calculator
 2024-06-09
Granite walkway - laying technology
Laying granite pavers in compliance with certain rules will help to implement a project for the improvement of a private plot, will be the best design technique for a park area, an area near a shopping center.
The elegant look and attractive texture make the paving very modern and stylish. The strength and durability parameters of granite paving slabs allow them to be used for up to 100 years without losing their original pleasant appearance.
How does the process of laying granite on the path begin?
Even before buying the material, you need to clearly define some points:
- carefully measure the area of the future coating;
- think over the layout and pattern if you use elements of different formats;
- Next, calculate the amount of material required. Add 10-20% to the resulting value to create a reserve in case of damage to the stone;
- buy all the necessary components for preparing the base and paving the granite path;
- take care of the availability of the necessary equipment and tools in advance;
- it is worth thinking about an assistant in the work. The process will go much faster if one worker prepares the base and delivers the materials, while the other is engaged in laying out and tamping.
The sales market offers a wide range of granite tiles in the format of triangles, rectangles, paving stones with various patterns. The natural structure is immune to ultraviolet radiation, moisture, and does not deform under the influence of external factors. This stone most closely meets the standards of the classic price/quality parameter.
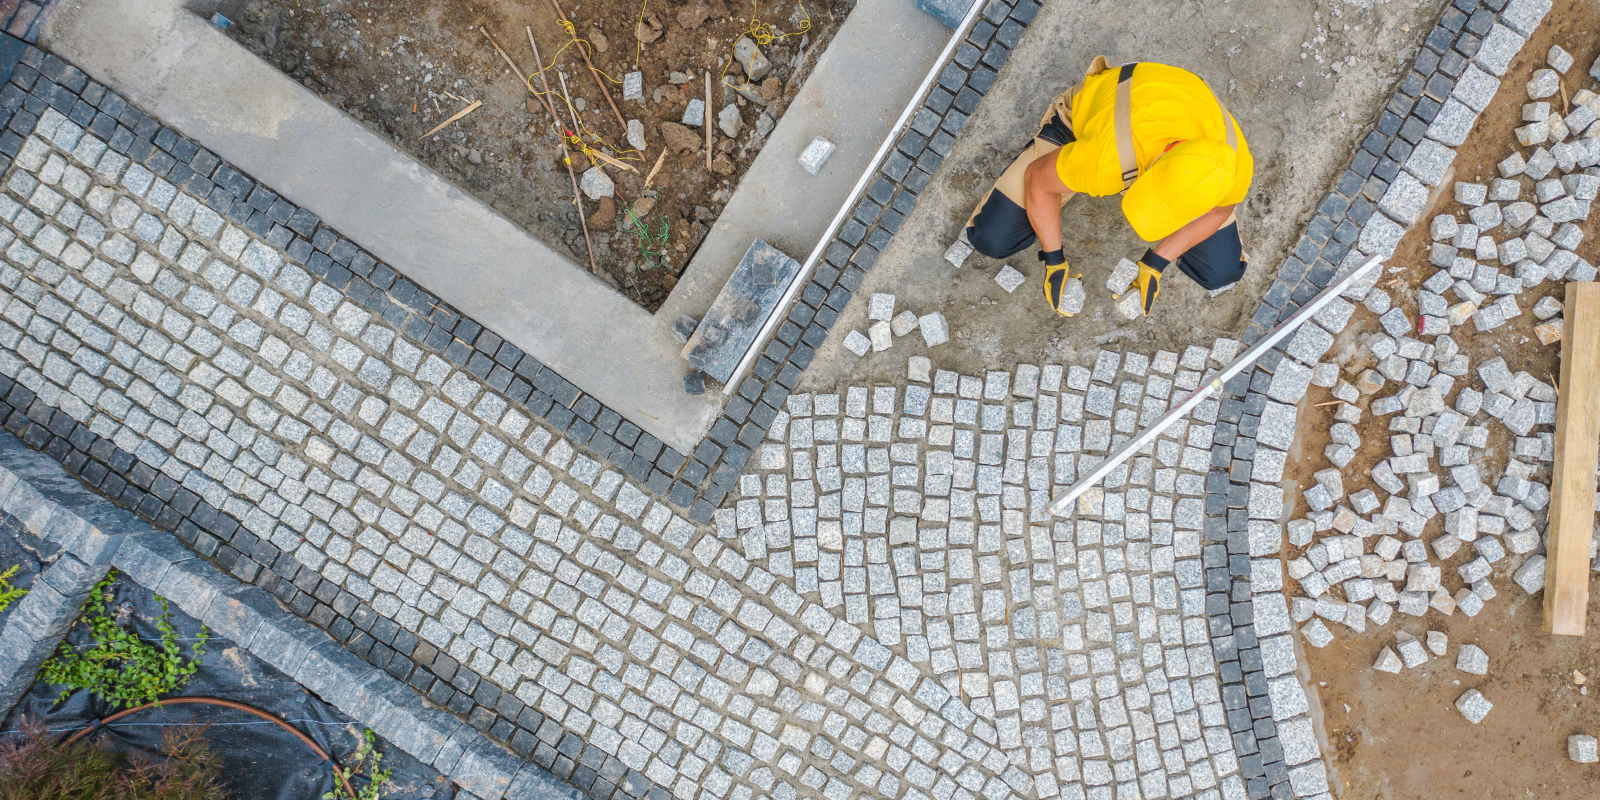
Popular schemes for paving granite walkway
Sometimes it is quite difficult to decide on the right scheme due to the huge range of shapes and shades of material offered by leading manufacturers. The classification by type of natural stone will help to simplify the choice - these are sawn and chipped samples, full-sawn, and gupta stone.
We should also mention the dimensional version of full-sawn slabs, which are on average 10 times larger than standard paving stones.
The configuration of the material determines the scheme of working with it:
- square granite tiles are usually placed using the technology of butt to butt, diagonal, wave, run-up;
- Rectangular elements are most practical for creating ornaments in the form of herringbone, wicker, run-up, as well as laying seam to seam;
- complex sets of granite are suitable for paving with a cross, braiding, well, in the Gothic style.
If you wish, you can choose the option with additional bright accents. In this case, you need to purchase material of at least two colors. If you take the time to calculate, you can apply a very elegant radial laying scheme.
Prepare the necessary tools and the base
To ensure that the work goes smoothly and without difficulty, we prepare all the necessary equipment in advance:
- a grinder for easy cutting of stone;
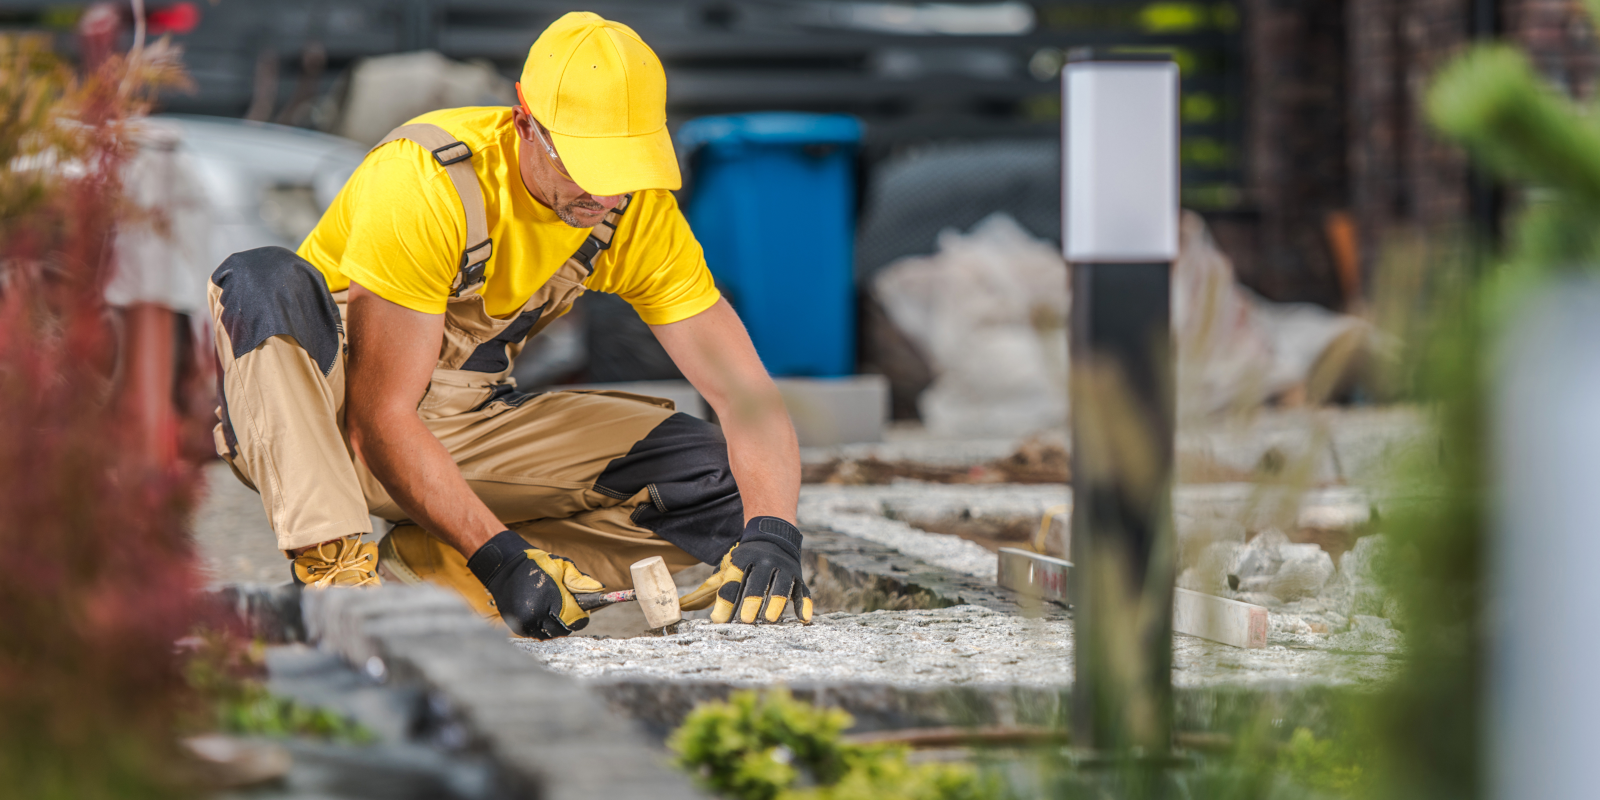
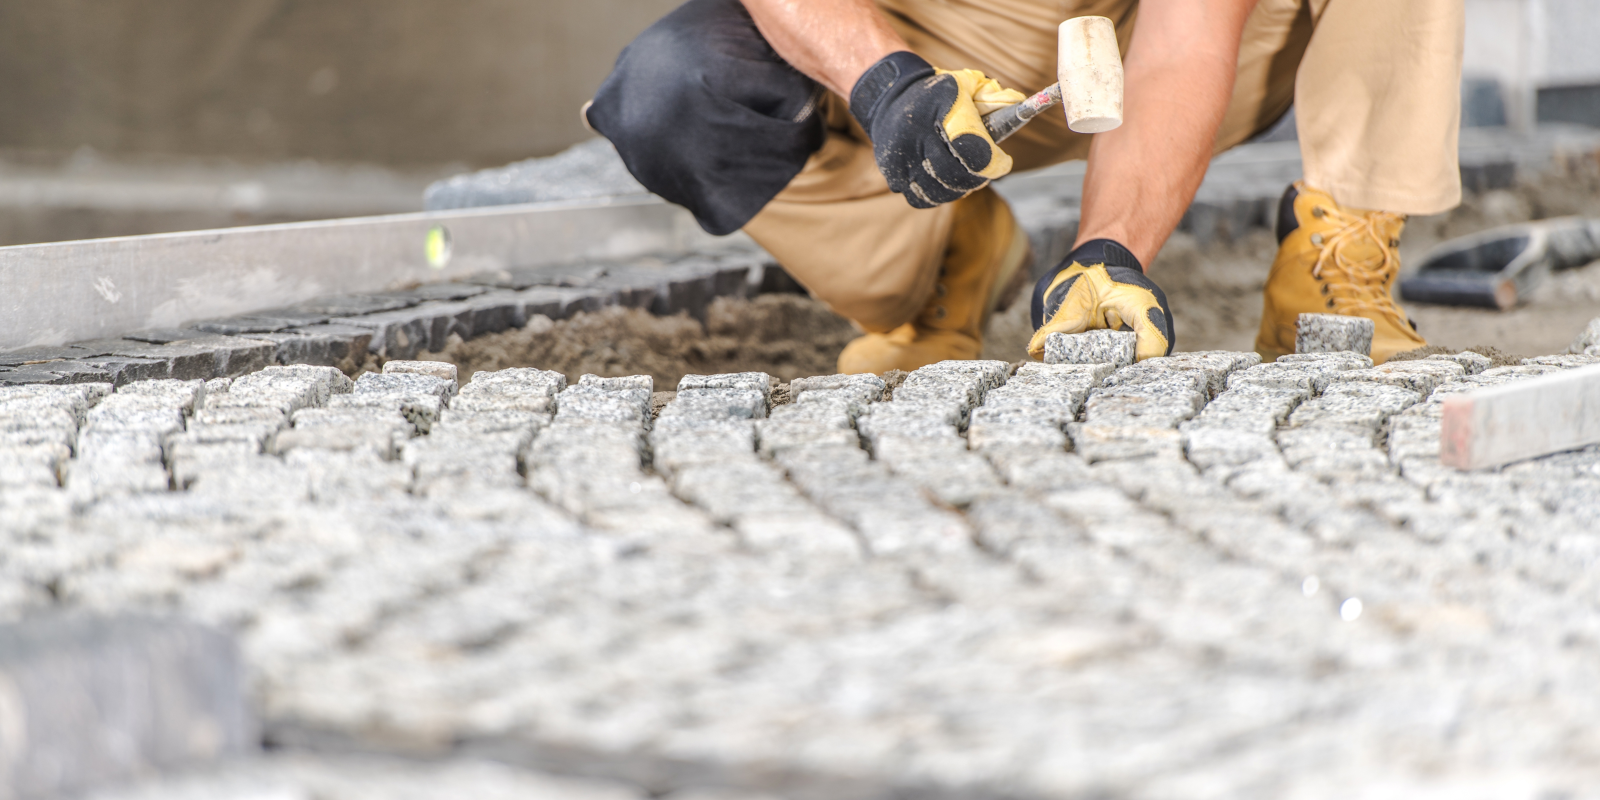
- a handy rubber mallet;
- rake, sturdy brush, shovel and tape measure;
- a large building level;
- a container with metal walls;
- watering can;
- wheelbarrow;
- a sieve for sifting sand;
- protective knee pads, gloves and goggles.
The rational use of all the necessary components requires careful calculation of the need for a certain volume of sand, cement mixture, crushed stone, and curbs.
A very important stage in laying granite paving is always the arrangement of the base. It all starts with removing the top layer of soil - this is sod about 20 cm thick.
The base consists of two parts.
1.The first layer
Coarse crushed stone or gravel with a “cushion” height, taking into account the future load on the surface. For a normal pedestrian zone, 10-15 cm is enough, and near a restaurant or roadway, this figure should be increased by 15-20 cm. Tamp the applied mixture firmly by hand or with a vibrating machine.
2.The second layer
Next, fill with sand and leveling using a rake and another tamping. It is recommended to add dry cement mixture to the sand in a ratio of 1:5. To improve the outflow of water and prevent grass from germinating, geotextiles can be placed between the sand and gravel.
The correct laying of the granite walkway implies that the tiles should be 8-10 mm higher than the planned figure. Over time, the surface will shrink and the material will be placed at the desired level.
This technique is recommended for chipped and sawn stone and for full-sawn tiles up to 5 cm thick, a concrete base should be prepared.
Instructions for granite paving technology
Paving stones made of natural stone always begin to be arranged from the extreme rows simultaneously on opposite sides of the prepared area. If the site has a longitudinal slope of 10° or more, the entire process should be carried out from the bottom up.
A high-quality result is achieved by following certain tips:
- all elements are placed perpendicular to the imaginary road axis;
- the joints should be offset by at least one third of the tile length;
- do not allow a seam width of more than 1 cm;
- always be guided by the advice that the creation of a cement-sand layer can lead to the subsidence of paving stones into the created base by about 1/3 of the height of the paving stones;
- strict adherence to an even height above the surface is achieved by pulling the thread.
Dense grouting of the joints between the individual elements is done with a sand-cement mixture that is homogeneous in composition to the one used to equip the base. The excess remaining on the surface is removed with a brush. A few days before the start of full operation, the entire work area is abundantly irrigated with water.
How is the installation of granite tiles on a concrete base done?
The difference with the technology of paving on a sandy structure is as follows:
- the road grid is overlaid with a top layer of fine gravel;
- the resulting surface is poured to a thickness of 10-12 cm with concrete;
- in some cases, for reinforcement, for example, under the roadway, a reinforcing cage is arranged on top of the mesh.
After the concrete has completely set, the granite paving begins to be laid using a special tile adhesive as a binding component. The parameters of the adhesive layer thickness are 2-4 cm.
Compliance with these recommendations will guarantee a good installation result.


